Showing posts with label craft. Show all posts

February 15, 2013

No Sew Fabric Pins


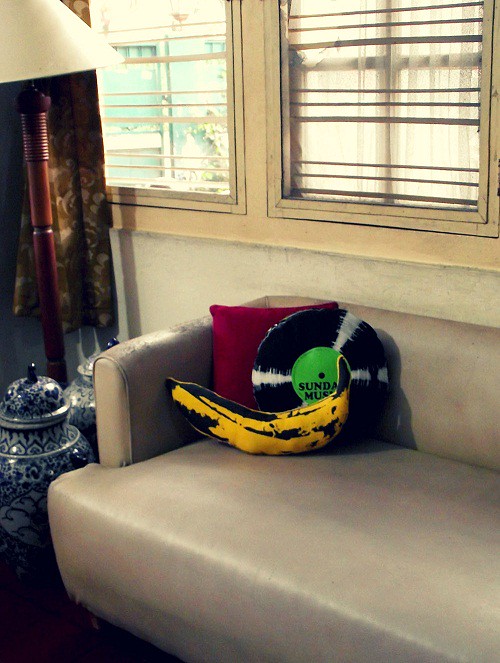
Okay, I have like posted the picture a long time ago in a galaxy faraway, umm no, I mean in flickr. Do people still posts on flickr what with instagram and everything? Well anyway, it's waaaaaaayyy long of an overdue so without further ado, here goes....

What you will need:
1. Fabric scraps
2. Felt fabric 
3. Scissors
4. Glue (I used UHU All Purpose Adhesive, glue-gun could also work well)
5. Safety Pins/ Flat-back pin thingies


STEP by STEP

  • Cut your felt into a simple shape, it could be a circle, diamond, triangle, cube, star, hexagon, whatever 
  • Overlap the previous shape with scrap fabric and cut around it while adding about 1 -1.5 cm ( 0.4 - 0.6 inch). Or you could just wing it (like I did), but make sure it is foldable enough.
  • Trim the corners if any to make it easier to fold. For roundish shape you might want to do a lot of small snips. See, toldya, make simple shape... Glue it around and fold.
  • Cut another bit of felt, again following the previous shape. This will act as a frame while it enforces your pin. It's really up to you on the sizing and color.
  • Cut another shape from felt, and make sure it will fit the pin. I like to do hearts.  Slather them with glue, especially the corners. I hate when the back of my pin/badges fall off, and this way the pin stays put longer because you didn't glue the pin to fabric, but it glued fabric to fabric which makes it stronger. 
  • You could decorate some more by adding buttons or googly-eye. Enjoy your pin! 
PS: I kinda hate the sizing on this tutorial, because usually all my posts (except the old ones) have a standardized width. But i kinda also want to make those looooong pinterest-y graphic. So yeah you cannot really have everything, can you?
I also took the photos for the tutorial using my camera-phone only (The future is now!). With crappy fluorescent lighting and actually doing it in my bed, so this post will be used as I reminder, if I ever get lazy (which happens a fucking lot)  to document my process.


May 8, 2012

POTATO PRINT TUTORIAL

Once upon a Sunday, I decided to play around with paint. And potatoes.
This project is super fun and easy. You could do it on paper or fabrics,  as for the paint just use whatever’s available.

January 10, 2012

Poppin Posh Pillows!!

FOR SALE!!!
E-mail me for details : )


size; about 38cm in diameter

size: about 45 x 15 cm.

January 10, 2011

From Paper to Fabric

From marker pens to threads. 

Finally my long longing of seeing my design being actually done came true. It's been almost a year! Phhhewwhhh!!! These designs are for my mother's mukena (moslem prayer wear) shop, GSA Collection. I find designing for my mother as quite interesting and challenging, for there are certain rules in Islamic art that need to be applied. For instance humans and beasts are things that should be avoid of, so in Indonesia most mukenas use floral motifs instead. But as a store that brands itself of providing exclusive and limited collection, my mother demand freshness, innovation and quality to each of her product. She's a perfectionist so she is naturally very demanding. Combined with her adept social skills and business instinct she is very successful in the business. 

In the past I've done candies, trains, even musical notes. And her head embroiderer/ designer, Soleh, has done coconut trees, gold fishes, and bamboos. Due to family problems he was vacuum for over year, and he's the only one who could translate 'out-of-the-box' designs  into embroideries. While others, while very skillful in embroidering, could only follow the already made examples or create new patterns but still in floral motifs (though still unusual in terms of forms or colors, following my mother's direction, they're not THAT surprising). So my designs are just dusting away for quite some times, until now....

"Delftware"

September 1, 2010

Fashion Recon: Fringe Shawl Tutorial


Okay, this is the last recon from my recent madness. Plus the tutorial. Here's what you need:

- Old T Shirt (the bigger the better, so you'd have larger shawl)
- Scissors
- Thread and Needle

That's all really. And I promise you it'll be easy peasy.


Fashion Recon: DIY Miu Miu Inspired Collar


I've been wanting to do this for ages, but haven't really got the ooomph to really do it. At least until now. I could've done the swallow or the cat, but noooo I have to challenge myself and do the nudes.... I love them barenaked ladies!
Bad decision.   


Unhappy with just one white nude lady I have to do another, let's do black this time and sorta give a Yin Yang vibe to it. RRrrriiight........  I would always get too carried away with my own thoughts and whambam! It looked nothing like the real thing. I am such a bad copier. Nevertheless, I'm happy enough with my result. But next time I'd just do the swallows.


June 3, 2010

Crafty Days Report

My sister and I had so much fun at Tobucil's Crafty Days 4. I could give you no pics to illustrate it, since my camera is broken, and I am not that happy with my cellphone photo results, so you just gotta take my words for it. This is my second on having a booth at Crafty Days, first it was with Bikin Barang and now I'm under the banner of Goodness with my sister. I used my handy dandy fake grass (often used as background for my product shooting) , an alphabet tree, and some pastel colored plastic baskets that I bought at Pasar Mayestik. I was kinda hoping for a fairy tale-ish look. Not sure whether it's working or not, because our nook was pretty crampy, tee hee...

I was ultimately swooned by Oma Anna's homemade jam and super-neat book binding and bright colored  hard-to-find batik collections. But I was so caught up between the rain, taking notes on custom-made requests, and packing stuffs, I forgot to buy them. Thank God my sister bought one (the cover is from Batik Gendongan! My favorite batik of all!), and she's been caught carrying it almost everywhere and almost all the time. She just got the scrapbooking-bug from our neighboring booth of four super sunny girls who called themselves De Rozalis. I think the six of us together  were the noisiest bunch of all the participants. And most  likely to be caught munching on candid shots.Thank You so much Wienny, Odin, Olin, and Kei for the absolutely wonderful time and oh-so-yummy homemade cupcakes. Be waiting for you girls to visit us here in Jakarta coret!

Due to the recommendations of Dindie, we crashed in for a night at this kitschylicious guest house called Tamara. You wouldn't know it's a guest house from outside, we could probably say the same thing by looking at its inside.There's no sign board or reception desk whatsoever. It totally felt like you're visiting a distant relative, a nice Auntie to be likely.

And I immediately go gaga over the Austin Power Bathroom with its straight from the 70s Euro decor catalogue matchy-matchy ceramics, brown-orange floral shower curtain, and mustard bath tub with its  brown so-you-won't-slip thingamajigs in the shape of flower matching the curtains! Oh!  Pooh bah, my long and boring words wouldn't do justice, I couldn't find the a bathroom that looks like it by Googling, however I found the a photo that pretty much match the tonal and overall mood of the room. I am so going back there and be like the lady in the pic below! 

found via Katnip


Memories of Malaysia (part two): Terengganu


Crafting is the main theme of the trip to Terengganu, and the reason I went to Malaysia in the first place actually.  Since the number of the participants got larger than before, Kak Ros invited me to assist her in giving craft-lessons for Malaysian ladies. It’s “All about Yoyos”, so no major worries there, I can do yoyos. And fortunately  there is no real language barrier since Malay and Bahasa have a lot similarities between them although the lovely ladies of Terengganu would   love to tease me for using nuance-differed words or my somewhat mixed-up Malay. Despite everything (there are some distasteful mishaps  with the organizer that I won’t mention here  but love to slander if given the opportunities), the five days were a blast. The Terengganu ladies are so awesome  that our 9  to 5 workshop sessions were so much fun. And yes, we cried as we said our goodbyes.

May 19, 2010

SAVE THE DATE!: CRAFTY DAYS 2010


I got my hands quite full , recently I've been preparing handmade Goodness for Tobucil's annual Crafty Days. Be there or be square!

April 23, 2010

More Goodness before Malay...

Ahhh finally, my not-so-secret battle of the unfinished crafts is won!!! Yay!!!! Watch my victory in all its glorious splendor. Accessories inspired by a Shakespeare's play where the mundane merged with the magical. "A Midsummer Night's Dream" jewelry collection. Will be available on Goodness soon...


Main Props: Fake grass, old books, clip-on reading light (should really buy another one), yellow chiffon shawl , and a tripod, and my Sanyo S6
Reblog this post [with Zemanta]

February 28, 2010

NO SEW JOURNAL COVER

 I was starting to grit my teeth when I found out that my one hour and a half handstitching are unusable. The supposedly "new" reversible cover for the new moleskine-droid journal was too small. But before I start  to launch an attack of the scissors to it, I try to get a hold of my self and ponder, "What would MacGyver Do?" *sssshhhh.... this is a real lightbulb moment*  "Of Course! Duct Tape!

pretty professional looking right?
Prepare your materials:

Hardbound book/journal, fabric (thick enough that you can’t really see through it),  pencil/pen, scissors/cutter, duct tape, all purpose glue, and spill/cutting mat (for me anyway for I tend to be a threat to almost-every-surface-except adamantium)

Click read more if you'd like to scroll,or click here to download the pdf version
Before you begin take heed to this advice; Ironing is Good.

December 17, 2009

The Quest for a Niche to call Nest

Weensy Whimsical Birdland Pincushion,  available in my etsy

For whatever cause or coincidence, it seems that I have completed a full-cycle that spans over a decade. I stepped out of mom & pop’s in 1999 to go to the university, and haven’t really been home since. Until recently.  Somehow life has strange ways of making you go on an "experience seeking and character building" adventures and taking you back to where it all began. I stand on the very brink of one of the most crucial moments of my life where drastic changes take place. I have made my choices. Quit my job and simultaneously ended a romantic relationship. Whether it was the right move or not, could only be judged in much later years. I am mentally and emotionally exhausted. However, I will not regret. Hey I think, it was also physically apparent, but I am still in-denial on this one, praise God for good concealer, sparkly yellow eyeliner, and bright colored bits and pieces in my closet! *cueing myself to cut the doom gloom*
I have baggage. And I carry the ever-growing burden everywhere without reluctance. It was “moved by de facto” if the last box of books is emptied. I automatically go into reminiscing-mode every time I  do this, and why the hell I have to leaf through my favorites once again and divided book by their binding methods, type, and size. Cause by a strange mixture of flightiness and acquired habit from my bookstore stint (and yes, I still squint and squirm at the very sight of a misplaced book, and often failed to stop squaring away book stacks). 

October 2, 2009

Subscription Mailer/ Used Postcard Gift-Box Tutorial


Inspired by this video by Etsy Lab  on packaging , I immediately pull out my ever littering paper stacks and get to work. And soon I was experimenting stuffs out, and this here is what I happily managed to came out with. I never really enjoy measuring things out and pretty bad at making proper pattern (hence the awkward sizing of 1.05 inch since it is the exact width of my handy metal-ruler), so I thought I should share this for the not-so-perfect no-fussy-bizniz cum not-so-perfectionistas like myself. Click pic to make it larger.


  1. Prepare your materials (used postcards and subscription mailer, scissors, cutter, ruller, pencil/pen). Sort the cards by size, and set  two identical-sized cards aside.
  2.  Measure 1 inch from each side and draw straight lines. Draw another line measuring 1 inch from the previous vertical lines.
  3. Cut the two horizontal lines until the x-markings continued by removing the outer small rectangles away.
  4. Cut small triangles on four sides as shown to make it easier to fold.
  5. Score all remaining lines (you could use the back of your cutter or in my case I use the tip of a mechanical pencil), and fold in.
  6. Secure with stapler or double tapes.
  7. And your box lid is ready. For the bottom part repeat previous steps except this time use 1.05 inch measurements. Adorn with colorful ribbons or yarns. And, Tadaahhh!!!

New Listing: Christmas Ornaments


I just finished painting these dangly darlings last night and glazed them this morning.  While I was uploading it to my Etsy shop, I got this call from GoodHousekeeping Indonesia asking me to join their Creative Christmas Tree Challenge, what a happy coincidence! Whooppeeeee....!

In the Mail! My Etsy Trade


My second Etsy trade has arrived! Yayyyy!!!!
These beautiful earrings is from Mel a jewel-maker from Australia, who happens to be of Indonesian-descent. I trade her's with my Candy Colored Tag that seems to be hearted by jewelry maker (my other trade is from another jewelry maker requesting the same thing only customized with her name on it, I haven't received it yet but I will soon post about it once it's arrived)

September 30, 2009

New Items!


From Borneo's glassbeads (that I bought on my mudik-trip), my spraypainted metal settings, and 18x13mm original japanese vintage cabochons that I got from Etsy these darling little things dangle merriily on a 50 cm silver colored chains with lovely toggle clasps.....
I am not so sure if I am ready to sell it just yet.....
I am also really happy with the way this large mother-of-pearl rose pendant ( this one is from this very old jewelry shop on my trip to Malang), that also matches beautifully with the recently bought glassbeads from Martapura, South Borneo.

September 29, 2009

Clay Play

Here's my latest craze.... the iClay from Amos. And no, this isn't some iPod hacks. The texture and colors are very similar to the usual claydough except that it could be hardened. Unlike polyclay it doesn't need baking, so oven won't be necessary since it could be air dried. Once dried (usually overnight) it becomes this rubbery thing that's very much like gum-eraser. Tried to glaze it with high-gloss varnish and it becomes sorta plasticky. Still having problems when I tried to glue it onto settings and wirings. I am using UHU's all pupose adhesive, any suggestion on better selection? ( and please don't mention the awesome E-6000 cause it is soooooooooo hard to find in Indonesia)


September 28, 2009

Feeling French!

You know what? I can cook!
at least I successfully made this Easy Breezy Please Me Frenchy Toasty....
I woke up with such craving for sweet pastries but the sun is already up, even though it's still 9 AM, it was dizzyingly hot. After a tad of google-ing I stumbled on this great recipe on the Amateur Gourmet. Thinking "Hey, even I might do this..." I immediately ransacked the kitchen to find the necessary ingredients (which weren't that hard to find either) and Voila!

Here's the recipe for those of you who are sick and tired with the are-you-trying-to-poison-me-look from your so called friend. This here is a recipe for two, If you are eating by yourself like I was,  just cut everything down by half...

Ingredients

- 2/3 cup milk
- 4 eggs
- 2 Tablespoons sugar
- 1 teaspoon vanilla or 1 Tablespoon rum (I used rum, of course, since I am pirate-ish)
- a pinch of salt
- 8 slices of bread
- butter/margarine for greasing the skillet with
- ground cinnamon and the kind of sugar that you put on donuts