
I was starting to grit my teeth when I found out that my one hour and a half handstitching are unusable. The supposedly "new" reversible cover for the new moleskine-droid journal was too small. But before I start to launch an attack of the scissors to it, I try to get a hold of my self and ponder, "What would MacGyver Do?" *sssshhhh.... this is a real lightbulb moment* "Of Course! Duct Tape!

pretty professional looking right?
Prepare your materials:
Hardbound book/journal, fabric (thick enough that you can’t really see through it), pencil/pen, scissors/cutter, duct tape, all purpose glue, and spill/cutting mat (for me anyway for I tend to be a threat to almost-every-surface-except adamantium)
Click read more if you'd like to scroll,or click here to download the pdf version
Spread your fabric wrong-side up, pin the corners so it won’t budge around too much and lay your book flat on top of it.
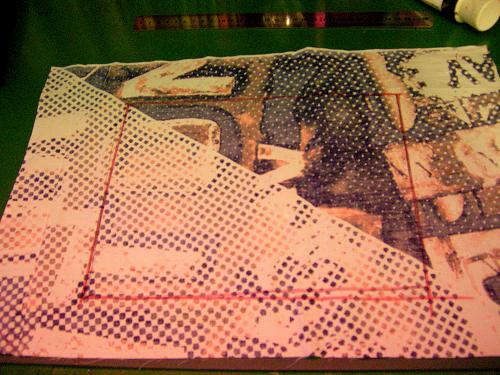
Trace around it lightly (I use contrasting color for photographing purpose only). Lift your book and get your duct tape ready.
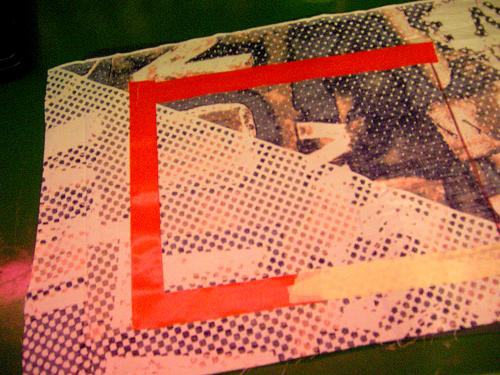
Stick the duct-tape on top of the 3 lines only. When applying tape, try to get the lines underneath to be in the middle of it. As you can see I sorta run out of, how many times did I have to say this but here we go, duct tape (!), so I changed it to mailing tape instead, which I rather loathe since they tend to get ripped way too easily. However do not be tempted to use cello-tape, ever! It’s too smooth and plasticky, the glue won’t bite it. Continue by cutting around the taped area, you don’t really have to be too neat since we’re going to cut it later anyway. Leave remaining fabrics uncut in the un-taped side.

Smother the front cover of the book with glue, I’m using the in-your-nose UHU All Purpose Glue which will make you wee bit woozy if you inhale it too much. But it works way better for me than the much raved about fussy-biznezz-gasolinal-stinker known as E6000. Lay your fabrics down and make sure your book sides are in the tape zone, smoothen fabric as you go. For those of you who struggles with fabric-wrinkles, this will be the right moment for me to say “Toldjah, Ironing!” Do likewise to the spine.
Before we glue the remaining fabric, fold the ‘tail’ a bit loosely underneath the book then cut.
nevermind the pudgy fingers and the whatsa-manicure-thumb, please
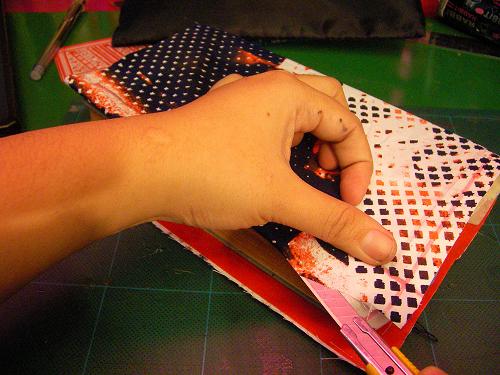
I found using cutter very convenient for this task. Stick duct tape underneath the fabric then glue and press
I found using cutter very convenient for this task. Stick duct tape underneath the fabric then glue and press

Cut tiny triangles between the spine and covers. If you are deftly dashing in your scissoring skill, just ignore this step
.
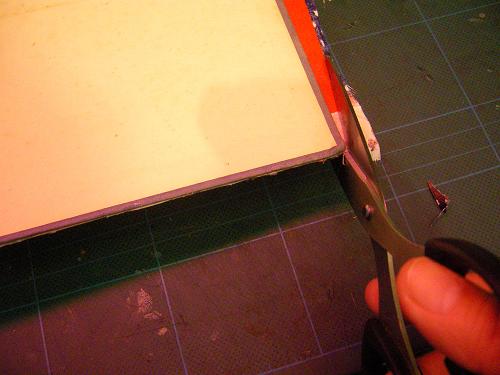
Let it dry a bit before you cut the juts. Try to trim it as close as possible to the original cover. If you accidentally chip away flecks of the original cover, worry not and use a similar colored Sharpie to hide the chipped bit out. If you missed the duct tape a bit and get frays, pray for polyester and carefully burn it with a lighter. If not, it won’t really matter anyway, no one will found out the flawing fringes, unless of course they have the scary combination of perfectionism and OCD with a freelance job as “critique” to boot.

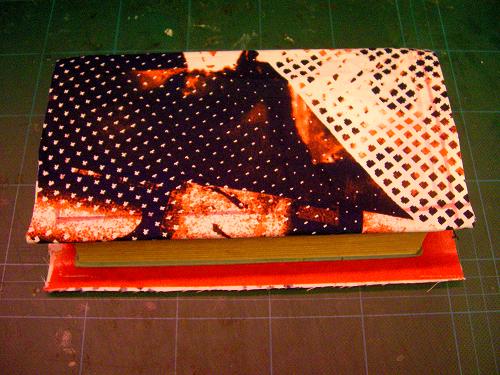
Basically you're done, Congratulations!!!! (I am currently concentrating on sending you a psychic-piñata, seriously). Admire your handy work and treat yourself a cup of tea and sweet munchies.
But if you are a "More is More" person such as Yours Truly, then dear decadent darlings, Read On!

Embellish!!! I used round self-adhesive labels to experiment further on this sticking tape to fabric project and it worked! Seems like you could easily shape fabric into anything you want just as long it stays inside the boundary of a sticky thing. There are also loads of option in the handy dandy non-glue solution of the iron-ons. But what's up with that blue tabs peeking underneath my Mock Moleskine if you may say? Well, I am trying to stop being a Chaos-incarnate and get myself out of my mess with this somewhat improvised GTD system inspired by hyalineskies. And isn't reorganizing simply look more dashing with these extra bling?

No comments:
Post a Comment